Getting Started Checklist
Step 1: Create an account
Step 2: Set your min and max prices
Step 3: Turn on repricing
Create An Account
Setting Mins & Maxs
Once your account has been created, the next step is to set min and max prices. There are three main ways to set Min & Max prices in Seller Snap:
CSV Import
The fastest way to update Min & Max prices is via a CSV import. Users will need to create a spreadsheet with the following columns.
- sku
- min_price
- max_price

It is also possible to import Cost (Buy Cost) and to enable Repricing via this import with the following spreadsheet column headers.
- cost
- repricing
Users can then navigate to the Listings Page in order to upload the CSV.

Here are detailed instructions on CSV imports.
Markup %
If users import their Costs (Buy Costs), Seller Snap can create Min & Max prices based on a markup percentage.
In this article, users will find the full instructions for enabling Markup %.
Update Manually
To set min and max, users can simply find the appropriate column and click on the field they wish to edit.
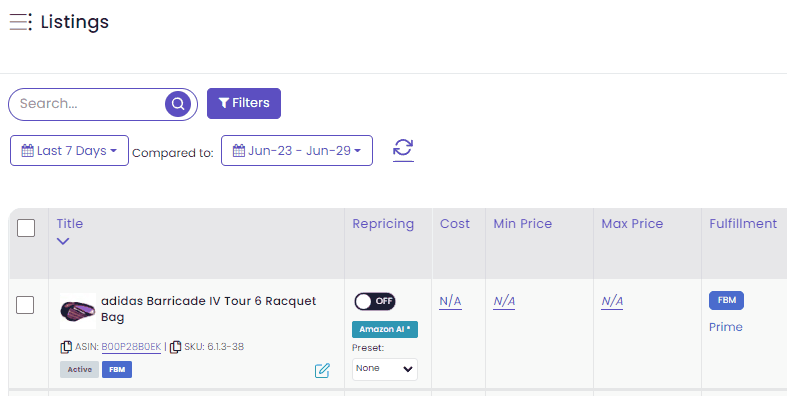
Alternatively, users may also use the Edit Listings Window by clicking on the green edit icon, as shown below.
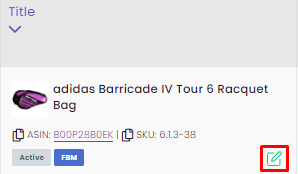
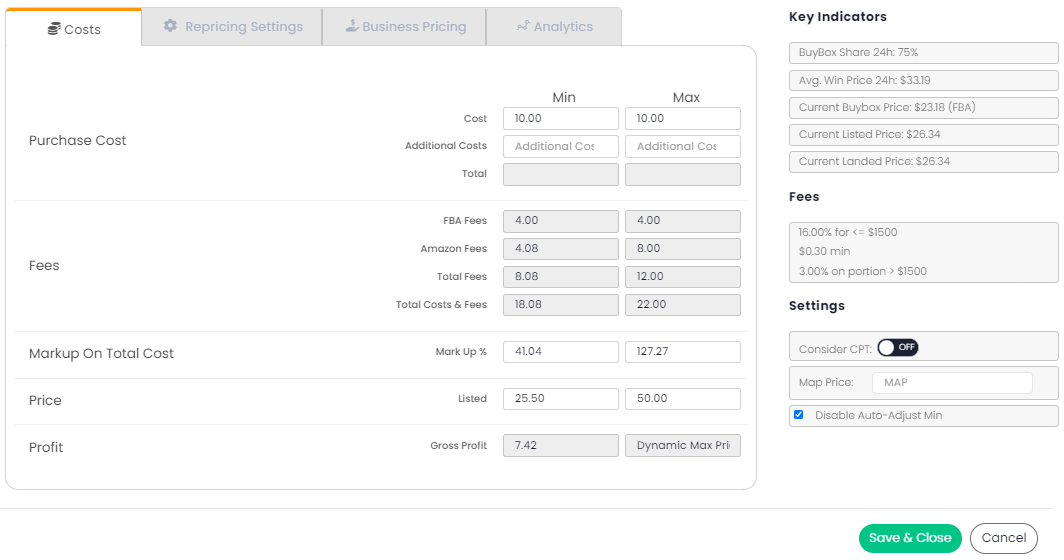
This will redirect users Edit Listings Window where the Seller Snap Min & Max Calculator is found.
Turn On Repricing
There are three main ways to set Min & Max prices in Seller Snap.
- Bulk Edit
- CSV Imports
- Update Manually
Bulk Edit
The easiest way to turn on repricing is with Bulk Edit, which allows users to easily turn on repricing, or update other fields, easily.
CSV Imports
Users may enable repricing with a CSV import. Users will need to create a spreadsheet with the following columns.
- sku
- repricing

Update Manually
It is also possible to enable repricing on a listing-by-listing basis via the Listing Table.
